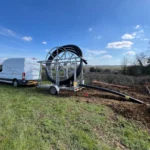
Horizontal directional drilling (HDD) is a trenchless way to install pipes, cables and ducts underground without digging an open trench. A steerable drill is guided along a planned path beneath the surface, creating a bore that the new pipe is pulled through. No trench, no road closure, minimal disruption.
It is the most widely used trenchless method in the UK, and it is what we do at Coates Trenchless. Water companies, gas networks, telecoms providers and their contractors all use HDD to install services beneath roads, rivers, railways and built-up areas where open-cut trenching would be too slow, too expensive or simply not allowed.
This guide explains how HDD works, where it is used, the kit involved, how it compares to other methods, and what to think about when you are planning a project.
HDD Explained in Plain English
Picture this. You need to get a water pipe from one side of a road to the other. The traditional approach is to dig a trench across the road, lay the pipe, backfill it and reinstate the surface. That means road closures, traffic lights, weeks of disruption and a large reinstatement bill.
HDD does it differently. A drilling rig on one side of the road launches a steerable drill head into the ground at an angle. We guide that drill head along a planned path beneath the road until it surfaces on the other side. The bore is then opened up to the size needed, and the pipe is pulled through.
The result is a pipe installed beneath the road with no trench, no road closure and no full-depth reinstatement. The only surface work is two small pits at the entry and exit points.
That is HDD in its simplest form. The same principle scales from a short utility crossing to a bore of a kilometre or more. The physics and the sequence stay the same. The kit and the planning grow with the job.
How Does Horizontal Directional Drilling Work?
Every HDD installation follows the same core sequence. The complexity and the timescale depend on bore length, pipe diameter and ground conditions, but the stages are consistent. Here is how we run it.
Step 1: Ground Investigation and Planning
Before any drilling starts, we design the bore path. That means:
- A desk study and utility records search to identify existing underground services along and near the route.
- Ground investigation (boreholes, trial pits or site scanning) to understand the soil and rock the drill will meet.
- Bore path design setting the entry angle, depth, curve and exit angle, allowing for the bend radius of the pipe and keeping safe cover beneath obstacles.
- A drilling fluid plan matched to the ground conditions.
- A method statement and risk assessment covering the drilling, traffic management if needed, and emergency procedures.
Planning is where a bore is won or lost. Get it right and the rest follows. Get it wrong and you risk failed bores, fluid surfacing where it should not, and delays. This is why we start every job with a site visit and a proper survey.
Step 2: Pilot Bore
The rig launches a steerable drill head into the ground at the planned entry angle. The head carries a transmitter (a sonde) that sends its position, depth and orientation to a tracking system on the surface.
The driller steers along the planned path using push, rotation and fluid pressure. A tracking operator walks the route above the drill head, watches its position in real time and relays corrections back to the driller.
Drilling fluid, a mix of water and bentonite clay, is pumped through the drill string and out through the head. It stabilises the bore, lubricates and cools the head, and carries the cuttings back to the surface.
The pilot bore creates a small-diameter hole on the planned line. Once the head reaches the exit point, the pilot bore is done.
Step 3: Pre-Reaming (Opening Up the Bore)
We swap the drill head for a back-reamer at the exit point and pull it back through the pilot bore, opening the hole to a larger diameter.
Bigger bores are opened in stages, one pass at a time. The final bore is usually 1.3 to 1.5 times the pipe diameter, to give clearance for the pullback. Drilling fluid keeps running throughout to hold the bore open and clear the cuttings.
Step 4: Pipe Pullback
With the bore at its final size, the pipe is connected to a pulling head and drawn back through from exit to entry.
The pipe is made ready at the exit pit first. For PE pipe, that means fusion welding the lengths into one continuous string before pullback starts. A swivel between the pipe and the drill string stops the rig’s torque transferring to the pipe.
Fluid is pumped throughout to keep friction down and the bore open. The rig pulls at a steady, controlled rate while we monitor the pull force. When the pipe emerges at the entry pit, it is in its final position.
Step 5: Testing and Commissioning
Once the pipe is in, we finish the job properly:
- Pressure testing for water and gas mains, to confirm the pipe is sound.
- CCTV survey for gravity drainage and ducts, to check line and condition.
- End connections to the existing network or new infrastructure.
- Backfill and reinstatement of the two small pits.
- Fluid management, with used fluid and cuttings collected, contained and disposed of correctly.
What Is HDD Used For?
HDD comes into its own whenever a pipe, cable or duct needs to go underground and open-cut is not the best option. The most common uses in the UK are below.
Water Mains and Sewers
New water mains, mains replacement and diversions. Water companies increasingly specify HDD where the total cost of open-cut, once you add reinstatement, traffic management and customer disruption, comes out higher than drilling.
A real example: we installed around 2 km of 250 mm MDPE water pipework for Thames Water across five fields near Bicester, completed inside a two-week window. For more on HDD in the water sector, read HDD for Water Main Replacement: How It Works.
Gas Pipelines
Gas main installation and diversion using PE pipe, including new network connections and mains replacement work.
Telecoms and Fibre Optic Cables
Fibre and duct installation for broadband and telecoms. Compact rigs are used heavily across UK full-fibre rollout for road crossings and duct runs in residential streets.
Electrical Cables
Cable duct installation beneath roads, railways and rivers, giving a clean protected route without disturbing what is on the surface.
River, Road and Rail Crossings
One of the oldest uses for HDD. Crossings beneath rivers, canals, roads, motorways and railways, with no need for road closures, track possessions or watercourse diversions.
Types of HDD Rig
HDD rigs are grouped by pullback force and drilling capability. The UK industry uses three broad classes.
Mini HDD
Small, compact rigs for short-range, small-diameter work. These are the most common HDD machines in the UK, used for telecoms ducts, service connections, water and gas service mains and short road crossings. They can often work from a single lane or footpath without a full road closure.
Midi HDD
Mid-range rigs for medium-length bores and larger diameters, used for water mains, gas diversions and longer road crossings. They need more working space than a mini rig but are still fairly compact.
Maxi HDD
Large, high-power rigs for long-distance and large-diameter work such as major river crossings, motorway crossings and trunk mains. They need a big working area and plenty of support kit.
At Coates Trenchless we specialise in compact directional drilling for utility work, with bores from around 30 m up to 2 km and pipe diameters from 32 mm to 250 mm. See our directional drilling service.
Advantages of HDD Over Open-Cut Trenching
| Factor | HDD | Open-cut trenching |
|---|---|---|
| Surface disruption | Two small pit areas | Continuous trench along the full route |
| Road closures | Usually not required | Often required |
| Reinstatement | Two pits only | Full trench reinstatement |
| Speed (for crossings) | Days | Weeks |
| Environmental impact | Minimal excavation | Large spoil volumes |
| Obstacle crossing | Roads, rivers, railways | Needs closures or diversions |
The cost advantage is clearest on longer runs and crossings. For very short, shallow work in open ground, open-cut can still be simpler and cheaper, and we will say so if that is the case.
Limitations and Considerations
HDD is not always the right answer. The things that shape a bore are:
- Ground conditions. Very hard rock, cobbles, boulders and made ground with obstructions can make HDD slow or difficult. A ground investigation first is well worth it.
- Minimum bend radius. The pipe has to follow the bore curve. PE bends well. Large-diameter steel or ductile iron is far stiffer.
- Inadvertent returns. Fluid can find its way to the surface through fractured or sandy ground. It is manageable with a fluid plan and monitoring.
- Existing services. The bore has to miss everything already down there. Accurate records and trial holes matter.
- Site space. The rig, pipe laydown and fluid system all need room. Compact rigs handle tight sites, larger rigs need more.
None of these rule HDD out. They are the things we account for at the feasibility stage, so the job runs cleanly once we are on site.
How Much Does HDD Cost in the UK?
HDD cost varies with bore length, diameter, ground conditions and rig size. There is no fixed rate. Every bore is priced on its own specifics.
The comparison that matters is not HDD cost per metre against open-cut cost per metre. It is total project cost, including reinstatement, traffic management, programme time and disruption. Once those are in the picture, HDD is often the cheaper option for crossings and built-up sites.
For a breakdown of what drives the price, read our guide: Directional Drilling Cost: UK Pricing Guide.
HDD vs Other Trenchless Methods
HDD is the most versatile trenchless technique, but it is not the only one. Here is how it sits alongside the others.
| Method | Best for | Limitations |
|---|---|---|
| HDD | New installs, crossings, long runs, steered paths | Needs workable ground; fluid management |
| Pipe bursting | Replacing an existing pipe on the same line | Only works where an existing pipe is in place |
| Microtunnelling | Very large diameters, hard rock, high accuracy | High cost, long setup, needs shafts |
| Auger boring | Short, straight crossings in stable ground | Not steerable, limited length |
| Impact moling | Very short, small-diameter connections | Not steerable, soft ground only |
For most UK utility work, HDD is the default. Pipe bursting is the go-to for like-for-like pipe replacement. Microtunnelling is kept for large-diameter or rock jobs where HDD cannot hit the required accuracy.
For a closer look, read HDD vs Microtunnelling: When to Use Each Method.
Choosing an HDD Contractor
If you are specifying or commissioning HDD work, the contractor matters. Worth checking:
- Equipment. Do they run the rig suited to your job, or subcontract it out?
- Track record. Have they done work like yours, in similar ground and sector?
- Survey approach. How do they handle utility surveys, trial holes and ground investigation before drilling?
- Fluid management. Do they have a plan for mixing, circulating, containing and disposing of drilling fluid?
- Insurance. Are they properly insured for the work?
A specialist handles all of this as standard. We keep it simple: clear communication, honest timelines, and no shortcuts on quality.
Summary
Horizontal directional drilling is the leading way to install underground services in the UK. It avoids the cost and disruption of open-cut, lets you cross obstacles you could never dig through, and gets the job done faster with far less reinstatement.
It is proven, widely available and suited to everything from a short utility crossing to a bore of a kilometre or more. What makes the difference is planning, the right rig, and a contractor who knows the ground.
Planning a project and want to talk it through? Contact Coates Trenchless for a free site assessment, or request a quote online.